


COMING SOON
WELCOMING BETA TESTERS
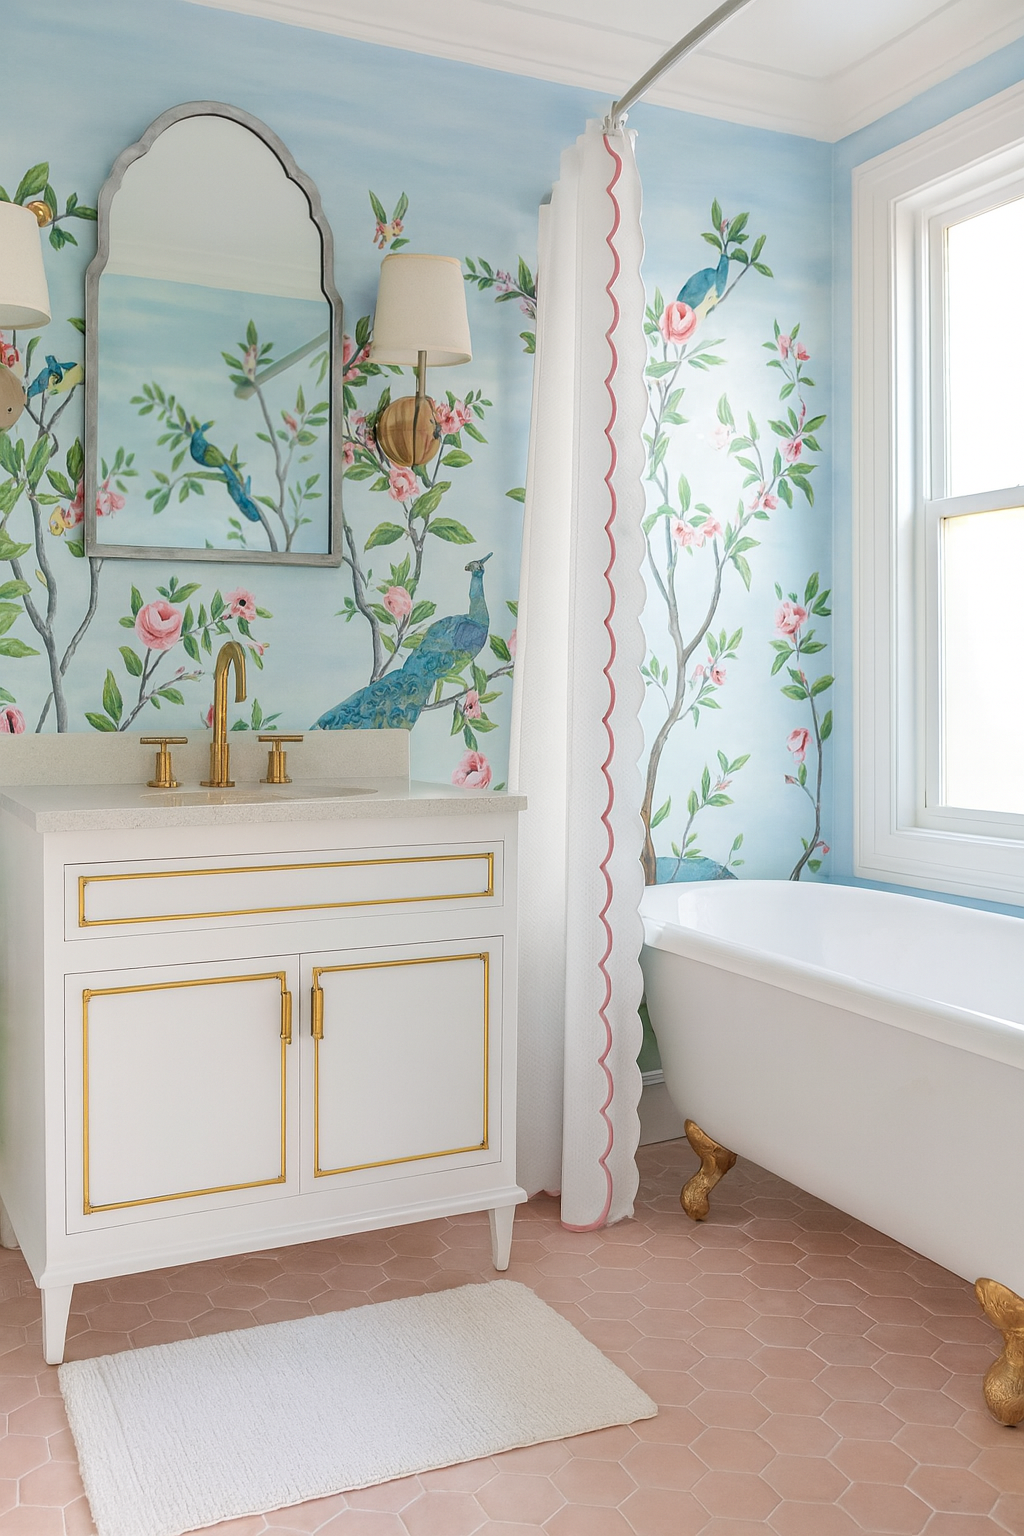
How to Remodel a Bathroom
Designed exclusively for professional interior designers.
In this digital course, you’ll experience what it’s like to manage a real bathroom remodel from start to finish. While the featured bathroom has already been completed, you’ll work through every stage of the process as if it were your own client project—responding to inquiries, drafting documents, preparing presentations, and managing all communication and deliverables.
In each lesson, you’ll go through each exercise and receive a new set of tasks and client feedback to address, mirroring the workflow of a professional designer. After submitting your work, you’ll receive a Designer’s Example — a corrected version used to review, refine, and perfect your documents. Think of it as a teacher’s key, helping you identify and correct mistakes just like in a design studio setting.
What you’ll learn
Create and manage the entire design process for a small remodel
Organize all documents, photos and project information
Respond to client inquiries and emails professionally
Draft a client contract, define a clear Scope of Work, and request a retainer
Submit a Scope of Work for contractor bidding
Track and manage your design hours weekly
Develop a detailed bathroom design questionnaire
Create inspiration and concept presentations
Produce floor plans and elevations
Source materials, finishes, and fixtures
Collect vendor quotes and create client proposals

Generate invoices and apply client payments
Create purchase orders for vendors
Oversee procurement and delivery
Conduct a virtual site review (using project photos) to identify discrepancies and address contractor questions
Perform a final walkthrough and prepare a Client Care Binder to close out the project
What you need to get started
Before beginning the course, make sure you’ve gathered all the required tools, programs, and memberships. It’s best to wait until everything is set up and ready to go, as organization is the foundation of a successful design business.

Design software: Design Files, Studio Designer or similar program for RFQs, proposals, purchase orders, and invoices
Presentation software: Canva, Photoshop, ChatGPT, SketchUp or PowerPoint
Drawing tools: Ability to create floor plans and elevations. Programs that draw to scale like AutoCAD or Chief Architect are ideal but not required as long as the proportions are close and the dimensions are labeled.
Documentation tools: Word, Excel
Time tracking: Harvest, Clockify, or another time management tool
File organization: A system such as Google Drive to manage project files
Some programs like Design Files and Studio Designer have multiple features so use what you are most comfortable with to get the job done.
If you’re unfamiliar with any of the recommended software, take some time to set each program up before you begin. Add your company information to Design Files, establish your billing rates in Harvest, and configure your line weights and layouts in AutoCAD. Getting organized early will make the project workflow much smoother.
How to Remodel a Bathroom
Things to note:
This course does not include construction documents, building codes, or detailed budgeting. Instead, it focuses on refining your interior design process and guiding you through the essential steps of remodeling a bathroom. The lessons are taught from a designer or decorator’s perspective—centered on aesthetics, layout, and finishes—rather than a construction or architectural standpoint.
-
Lesson 1
-
Exercise 1: Reply to a New Client Inquiry
A new prospective client has just reached out needing help with a small bathroom remodel. As a designer, this is your first opportunity to make a great impression and establish trust while guiding your client through your process.
-
Exercise 2: Mock Phone Call Script
Now that you new prospective client has scheduled her introductory phone call, it’s time to practice your conversation. The goal of this call is to build rapport, understand the project scope, and explain your process clearly.
-
-
Lesson 2
-
Lesson 3